Create a review template as Conrad Simms

-
In a web browser, access the GlobalCorp solution
template at http://<livecycle server name>:<port>//reviewportal.
For example, http://localhost:8080/reviewportal.
-
In the
Username
box, type
csimms
and,
in the
Password
box, type
password
.
-
Click
Templates
and then click the
New
.
-
In the Template Definition page, provide the following information
and click
Next
:
-
In the
Template Name
box,
type
Global Corp. Design Review and Approval
.
-
In the
Regulation (SOP)
box, type
GC-ENG-100-001
.
-
In the
Description
box, type
Review and Approval process for all engineering designs
.
-
Because the approval stage is starts immediately after the
review stage, select the
Enable Straight-through Processing
check
box.
-
Ensure the
Active
check box selected so the template
is available for use after it is saved.
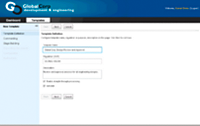
The
following illustration shows the Template Definition page.
-
In the Commenting page, select
Reviewers Can View Comments Made By Others Within The Stage Only
.
-
-
In the Define Type list, select
Parallel Review
.
-
In the
Name
box, type
Collaborative Design Review
,
and click
Create
.
-
In the
Expected Stage Duration
box, type
5
.
-
Click
Next
.
-
Click
Add New Stage
.
-
In the Stage Building page, complete the following steps
to create an approval stage
-
In the Define Type list,
select
Serial Approval
.
-
In the
Name
box, type
Design Approval
,
and click
Create
.
-
In the
Expected Stage Duration
box, type
2
.
-
Select
Enable Reminders
option and select
1
day
before
the stage duration ends.
-
In the
Signature
box, select
Client-Side
, and
click
Next
.
-
In the
Design Approval:Approvers
review stage, type
alex
and
click
Search
.
-
In the Search Results list, select
Alex Pink
, click
Add Approver
,
and then click
Next
.
-
In the Supporting documents page, click
Browse
.
-
In the Select File To Upload by <livecycle server name>,
navigate and select a file, and click
Open
. For example,
select a file named DesignReviewPolicies.doc.
-
Click
Attach
and then click
Next
.
-
In the Configuration page, from the Approval Routing Slip
list, select
Managed ReviewAndApproval-Sample/processes/Approval Routing Slip Creation
,
and then click
Next
.
-
In the Audit Levels page, select
Level 2
and click
Select
.
-
Click
Finish
.
-
Click
Logout
.
|
|